Did you ever try to make bread for the first time and start to second-guess the recipe — and yourself — did I add the salt? – is that enough water? – does the timing really seem right? Even after you transform the shaggy unorganized mass into a smooth, elastic and silky boule you may well speculate what will be the outcome after its trial by fire? Then comes the moment of truth when you peek into the oven to see your bread … and it’s flat as a pancake; premonitions and worries confirmed …. well I am happy to say this was not the case with this recipe, these are little gems!
If you do not have the book…I would highly recommend that you borrow Daniel Leader’s Local Breads from a friend, take it out from your local library or buy it (maybe a new printing has the updated recipes) just to read about his adventures tracking down the artisan breads across Europe, and the stories behind the bakers of these great breads. The Little Blue Cheese Rye Loaves was one of several recipes from a chapter devoted to the breads and bakers he found in the Auvergne region in the heart of France. After reading the picturesque narrative of the mountainous area and his journey to a tiny mountain village of Loubeyrat to meet Pierre Nury, recipient of the Meilleurs Ouvriers de France (France’s highest award for pastry chefs) … I started thinking about taking the same journey in the near future.
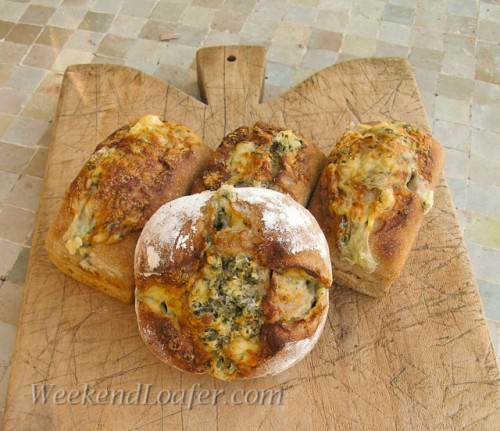
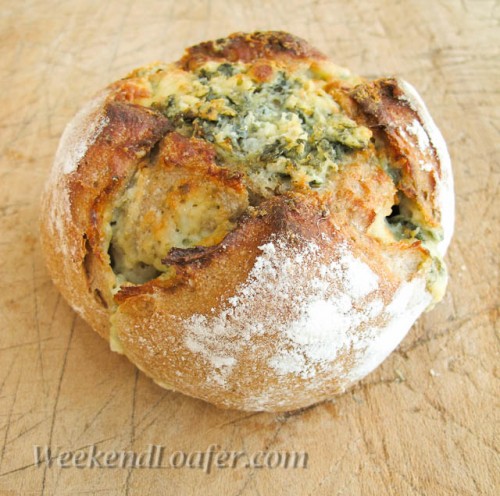
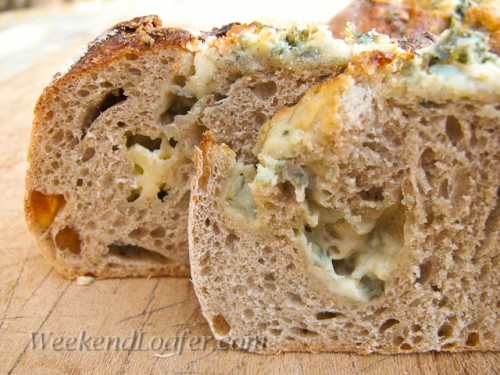
But I have to admit, since I decided to bake my way through Daniel Leader’s Local Breads (the sour dough recipes for now…anyway) there has always been that added element of surprise. It reminds me of a great line form the Forrest Gump movie… “Life is like a box of chocolates…you never know which one you will get.” Even though I have the corrections put out by Bread Alone and have printed out the corrections noted by those great bakers at Fresh Loaf….somehow there is always an added element of the unknown. This dough, however, is actually very easy to work with and displays a very good oven spring, considering Leader writes “Weighed down by the cheese, these loaves will bake low in the pans”. The only real shocker my first time making the Méteils au bleu…. was I only had 3 of the 4 small loaf pans needed, something which turned out to be a blessing in disguise. I shaped the extra fourth piece with the chunks of cheese incorporated into a boule and let it proof in a small bowl lined with a floured piece of linen. When the time came to take the loaves out of the oven, I started to laugh out loud ( I am glad no one was around…they would have thought I had finally cracked) as the little boule had split wide open and looked like a volcano spewing lava down the sides of a mountain. The smell and taste of the warm bread was, however, no laughing matter…..the melding of the two flavors from rye and blue cheese is a great combination. It is like no other bread I have ever tasted. The next time I make this bread, I am going to try Leader’s suggested variation, Seigle aux rasins et pistache but not in a loaf pan. I’ll make little boules again: they look so cute!
Little Blue Cheese Rye Loaves
Adapted from Daniel Leader’s Local Breads
Desired dough temperature 76°
Levain Starter:
- 45g stiff levain starter
- 95g unbleached bread flour, preferably high gluten (I used Type 65)
- 5g stone-ground whole wheat flour
- 50 g water
Ingredients:
- 275 g Type 65 flour
- 225 g light or medium rye ( I used Type 150 flour and I sifted it)
- 30 g la farine de gluten (optional, the French flour tends not to be so strong)
- 350 g water
- 125 g stiff whole wheat levain
- chilled blue cheese cut into 1/4 inch pieces (use a firm cheese if you can find it)
- 10 g gray sea salt
Bread method:
- Take your levain out of the refrigerator, weigh out the appropriate amount of starter and mash the levain with a whisk in a bowl with the water. Add the flour and stir with a spatula until it comes together. Turn out onto the work surface and knead to incorporate the flours. Place the levain in a covered container and let it sit at room temperature (70 to 76°) for 8-12 hours or until it has doubled in volume and the surface is domed.
- Pour the water into a large mixing bowl or the bowl stand mixer. Combine the flours until all the ingredients are incorporated. Cover and let it rest for 20 minutes, while the flour hydrates and the gluten begins to develop. (I could not fit my Kitchen Aid Pro in my suitcase, so I mix by hand… I autolyse/rest for one hour before adding the levain, which really helps the gluten develop)
- Kneading By hand: Turn the dough out onto your work surface. I flatten the dough into a large rectangle; smear the levain on top of the dough. With floured or oiled hands knead a few strokes to fully incorporate the starter, flatten out the dough, evenly disperse the salt and continue kneading for 12 to 15 minutes. I use a combination of the French kneading technique and the method described here if the dough is really wet to start. For the first couple of minutes it will be a sticky mess on your work surface, but do not yield to the temptation of adding more flour. Stop occasionally and use your bench scraper to gather any stray dough from your work surface. Continue until you have a good gluten development. You should be able to gently stretch a piece of the dough into a thin membrane that you can almost see through without it tearing. By machine: Add the salt and levain and mix on medium speed until the dough cleans up the bowl and you reach a good gluten development.
- Transfer the dough to a lightly oiled container. Cover and let it ferment at room temperature for one hour (70 to 75°). (I keep the dough at a consistent temperature 76° throughout.) If you would like to get a good overall picture of the bread making process for the home baker, I highly recommend you check out Mark’s videos at the Back Home Bakery
- Turn the dough out onto your lightly floured work surface, fold the dough and return it to oiled bowl with folds on the bottom and cover. Let the dough ferment for 2 to 3 hours more. You can incorporate another fold after 50 minutes if you’re dough does not seem to have strength.
- Cover and let the dough rise till it is domed and doubles in volume. This should take about 2-3 hours depending on the proofing temperature.
- Prepare the loaf pans with a little oil. Turn the dough out and divide into four even pieces. Flatten the four pieces into 4 inch squares. Arrange the chilled pieces of cheese over the dough, reserving three pieces for the top of each loaf. Roll up the dough tightly to avoid big gaps around the cheese. Place the loaves into the pans seam side down and gently press to make contact with the side of the pan. With a knife or razor blade cut a slit into each loaf, about 1/4 inch deep, and place the reserved cheese in the cut. For the boule I slashed it with a big X in the top.
- Proof the loaves at room temperature (70-75°.) until they look slightly inflated. (mine rose considerably) This should take about an hour or an hour and a half. When you press your floured finger on the surface, it should spring back slowly.
- About one hour before baking, preheat the oven to 450° with a baking stone and a tray in the bottom of the oven for steam. I like to add one cup of water to the bottom tray a few minutes before putting the loaves in the oven to produce a moist environment for baking the proofed loaves.
- Slide the loaves onto the baking stone, turn down the oven to 400-425° and continue to bake for 25 to 30 minutes. (I turn the oven down to 425° and then after 15 minutes, rotate the loaves to get an even distribution of the heat.) Bake the loaves until they are an even “ruddy brown” and the cheese is melted.
- Turn out the loaves it may help to tap the edge of the inverted pan to release the loaves. Let cool for at least one hour on a wire rack before digging in. I could not resist… and I devoured one while it was still warm… Yum!
This is being submitted Kochtopf for World Bread Day 2011


Hi Judd, this little volcano is so tempting! I wish I could have a bite. Can we come and visit you on your mountain top next time we are in your neighborhood?
I have to admit I have these doubts most of the time. 😉 Fortunately the bread comes out just great most of the time, too. Your loaves look perfect. Love them! Thank you for participating in World Bread Day 2011.
Can not wait to see all the breads…great event…
They were very tasty…You have to be lost to be in my neighborhood…but yes come and visit… there is a gite a short walk from the cottage that also makes and sells some really good goat cheese!
Looks good enough to eat!