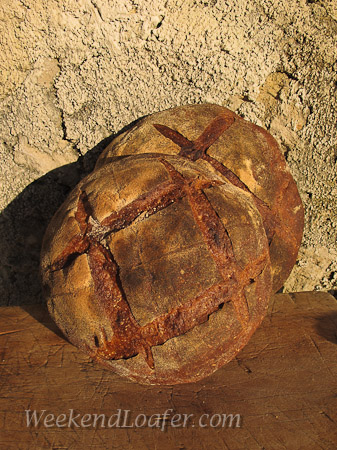
With my bread supply almost depleted and my neighbors arriving for their monthly visit to there retreat… I charged up my stiff Levain and was ready to conquer another recipe from Local Breads for my weekly bread. I thumbed through the chapter with stiff dough levain recipes and to my complete surprise, I baked them all! I did not have time to convert the waiting stiff levain to a liquid one…so I went into the pantry to inventory my baking supplies and discovered I had lots of high extraction flour, spelt and an unopened bag of quinoa (never used it before in pain). And with that the experiment was on. The first thing that came to mind was a giant Poilane-inspired Miche with mixed flours …. while the other side of my brain was saying “try something sure-fire, something to share with your neighbors.” Well — throwing caution to the wind — I went for the Miche! I wrote out the recipe and doubled it substituting some (approx. 1/3) of the whole wheat flour for the spelt and quinoa…and then adding a smidgen of rye. After an hour of antolyse, and another 15 minutes of slapping and smearing a very slack dough into workable dough, I took a breather and wiped the sweat for my brow.
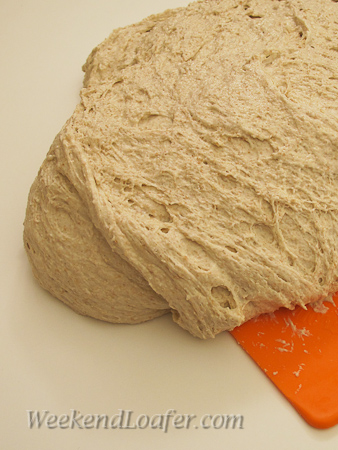
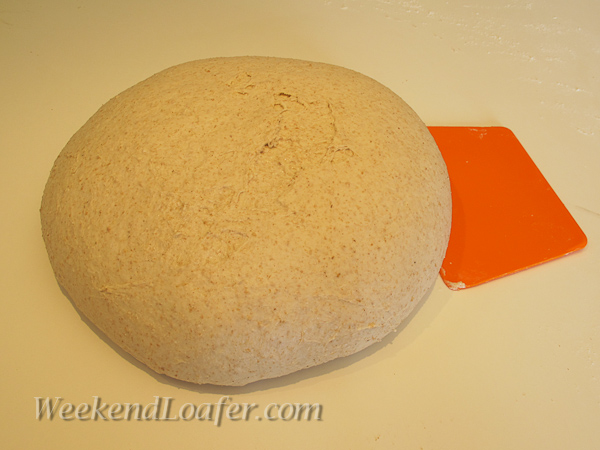
When I returned to my experiment rejuvenated by a good cup of strong French style coffee, I uncovered the dough to find the once taut boule was now, shall we say, relaxed and spread out on the counter . . . ugggh. As I started to panic I heard a voice in my head saying “you can never over knead a dough by hand”. So I continued the French kneading for another ten minutes, did a window pane test, and it passed the test! I threw the still slack dough into a bowl for one hour to ferment, crossed my fingers and hung my laundry out to dry. After two series of stretch and folds in the bowl, I covered it back up and put it into the 76° proofing chamber for two hours before shaping. Shaping the slack dough into a miche was a little more artful than I had planned for…but these loaves gently made their way into the linen lined bowl and banneton for the final two hour proofing. And that was my big mistake!
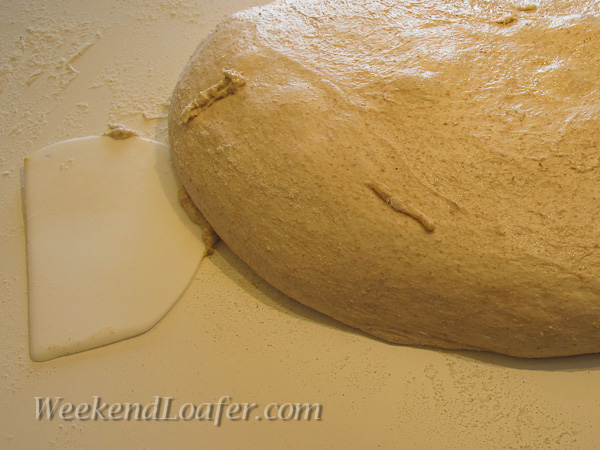
When I finally looked in after two hours, it had more than doubled and looked like a pillowy, bowl of loose Jell-O full of air bubbles. Because of the size of the boules…and the size of my oven…I put the smaller one in the fridge to slow things down, and gently turned the other out onto a piece of parchment paper, slashing it swiftly with four crossing lines. The only thing that comes to mind when trying to describe the sensation of slashing the miche, is the feeling you have when running over a nail on your bike…first you hear the pop and then you see it slowly deflate. Sound familiar?
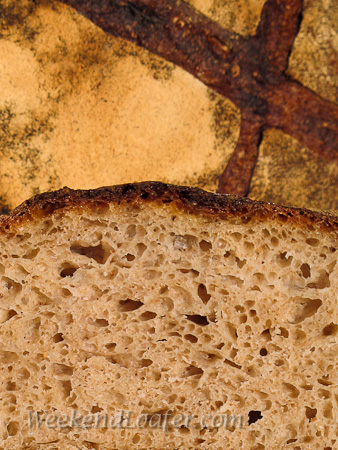
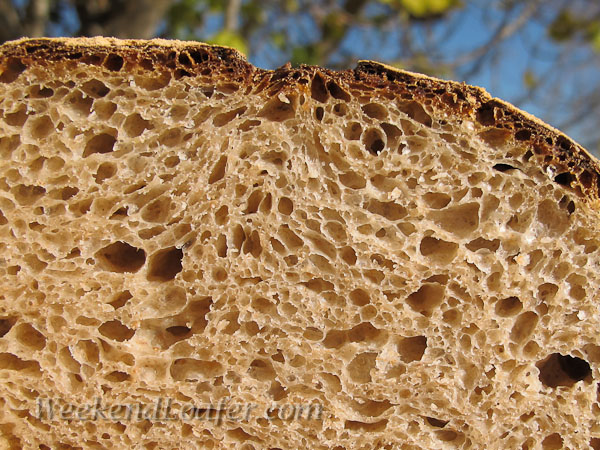
Feeling a bit deflated myself…I placed the miche in the awaiting, steamy oven for its trial by fire! As I peered through the glass of the oven door, I was a bit relieved to see the loaf making a bit of a comeback. Although it did have a little oven spring, it wasn’t what I was hoping for. Though it wasn’t a pancake, let’s just say it had a low profile, something more similar to a Pointe-à-Callière Miche! After baking the other loaf and letting it cool, I cut into the small loaf to see the outcome. The tan crumb was riddled with small even bubbles, the crust was crisp and brittle….and the taste was even better than I expected. It had a very moist, creamy mouth feel with a bit of a tang, but not too much for my French neighbors’ pallets …they really enjoyed it. I will be very curious to see how the flavor transforms over the next couple of days of eating. This is one I definitely will have to revisit again!
Thing to remember next time:
- Try pre-fermenting some of the spelt and quinoa…
- Hold back some of the water in the initial mix (I knew that), you can always add it to get the necessary consistency.
- May be leave out the autolyse?
- Either lower the temperature for the final proofing or cut it back to one hour.
- AND: DO NOT TAKE A NAP DURING THE FINAL PROOFING!
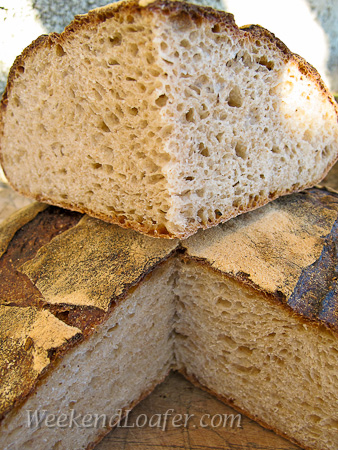
An Experiment – Miche with high extraction wheat, spelt, quinoa and a smidgen of rye
Very Lo o s e l y Adapted from Daniel Leader’s Local Breads Pain Poilane
Desired dough temperature 76°
Makes 2 large miche or 1 very large miche
Levain Starter:
- 100 g stiff Levain starter
- 100g Bio (organic) Whole Wheat Type 150 (90-98% extraction)added for the extra bran
- 100g Bio Whole Wheat Type 80 (82-85% extraction)
- 150 g water
Ingredients:
- 750 g Bio Type 80 (82-85% extraction)
- 125 g Bio Spelt flour
- 125 g Bio Quinoa flour
- 17 g Type 130 Rye
- 750 g water
- 450 g stiff whole wheat Levain (all of the above)
- 20 g salt
Bread method:
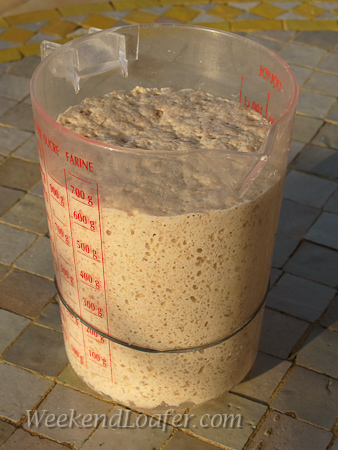
- Take your levain out of the refrigerator and mash the levain with a whisk in a bowl with the water. Add the flour and stir with a spatula until it comes together. Turned out onto the work surface and knead to incorporate the flours. Place the Levain in a covered container and let it sit at room temperature (76°) for 8-12 hours or until it has doubled in volume and the surface is domed.(oops…mine tripled in 8 hours at 73°…must of liked the organic whole wheat)
- Pour the water into a large mixing bowl or the bowl stand mixer and mash the levain with a whisk until it is liquefied. Combine the flours until all the ingredients are incorporated. Cover and let it rest for 1 hour, while the flour hydrates and the gluten begins to develop. (I could not fit my Kitchen Aid Pro in my suitcase, so I mix by hand… I autolyse/rest for one hour, which I think really helps the gluten development)
- Kneading By hand: Turn the dough out onto your work surface. With floured or oiled hands knead a few strokes to bring the rough mass into a ball, flatten out the dough, evenly disperse the salt and continue kneading for 12 to 15 minutes. I found that this is a slack dough (it could have been that it had rained for 6 days straight and the humidity in the cottage was hair curling) and you will need to use a combination of the French kneading technique and this method if the dough is really wet to start. For the first couple of minutes it will be a sticky mess on your work surface, but do not yield to the temptation of adding more flour. Stop occasionally and use your bench scraper to gather any stray dough off of your work surface. Continue until you have a good gluten development. I kneaded by hand for 15 minutes let it rest and then continued for 10-15 minutes more! A good work out! You should be able to gently stretch a piece of the dough into a thin membrane that you can almost see through without it tearing. By machine:Add the salt and mix at medium speed until the dough cleans up the bowl and you reach a good gluten development.
- Transfer of the dough to a lightly oiled container. Cover and let it ferment at room temperature for one hour (76°). (I keep the dough at a consistent temperature 76° throughout.)If you would like to get a good overall picture of the bread making process for the home baker, I highly recommend you check out Mark’s videos at the Back Home Bakery
- Turn the dough out onto your lightly floured work surface, fold the dough twice(I needed give it extra folds) and return it to oiled bowl with folds on the bottom and cover. Let the dough ferment for 2 to 3 hours more. You can incorporate another fold after 50 minutes if you’re dough does not seem to have strength. (You might what to consider the extra folds depending on the type of flour used.)
- You can make one big miche with all the dough. I divided it into two pieces, one approx. 900 g and 1200 g and lightly pre-shape into a boule. Lightly flour the dough, cover and let rest for 10-15 minutes to relax the dough. (This dough was VERY relaxed… )
- Gently shape each piece of dough into a boule and place seam side up on a floured linen/towel in a bowl or into floured bannetons. Cover with a plastic bag or an oiled piece of plastic wrap and proof at room temperature for 2-3 hours. When you press your floured figure gently on the dough, the indentation will spring back slowly. (Be careful…mine was over- proofed!!!)
- About one hour before baking, preheat the oven to 500°with baking stone in the middle of the oven and a tray in the bottom of the oven for steam. I like to add one cup of water to the bottom tray a few minutes before putting the loaves in the oven to produce a moist environment for the baking of the proofed loaves.
- Gently turn the proofed miche onto parchment paper or your floured peel. Score the miche. Slide the loaves onto the baking stone, turn down the oven to 470° and continue to bake for 35 to 50 minutes. (I turn the oven down to 450° and then after 20 minutes, rotated the miche to get an even distribution of the heat.)If you are baking one big loaf, bake until the crust is walnut brown. For a good crust you want a bold bake, when you tap the bottom of the loaf you should hear a hollow thud (that is a technical term).
- Let cool on a wire rack before digging in. This bread gets better with age and will stay fresh up to a week or more.
This bread is being sent to YeastSpotting the guest host this week is… Tartine Bread Experiment








I love the photo with the triangular shot. I also love the crumb in this loaf. Spectacular!
Thanks MC..
Someone asked if i used a laser to cut it…
I am going to remake and see if i can get fermenting right…
It kind of fainted when it saw the blade 😉